Why Your Waistcoat Sewing Pattern Didn’t Work
Sewing a waistcoat looks like a fun, quick project. But it's often more challenging than it looks.
Picture this...you have a design in your head. You know exactly what you want. So you spend hours searching for a waistcoat sewing pattern that comes as close as possible to the thing you can already see.
You find one that's sort of right. Then you start hacking into it, creating your exact design. Hoping and praying you haven't accidentally wrecked the balance, and that it'll still fit your proportions by the time you're finished.
Then you make your toile. You put it on and....it's not what you imagined. The new neckline looks weird. The fit is completely off. And you have no idea which bit to fix first, or even how to do it.
So it goes on the "I'll come back to this later" pile.
We've all been there. I want to explain what actually went wrong, because it isn't you, and it isn't really the pattern either.
Why hacking a waistcoat pattern sometimes goes wrong
Here's the bit nobody tells you, commercial patterns are developed the same way as commercial clothes.
Every commercial pattern is drafted for one set of body proportions. One block, one shape, one set of measurements. Everything else in that size range is graded up and down from that single starting point.
That's fine when you sew it as it comes and you just make small fitting changes or a really simple design change. But once you start to change the design and the fit drastically you’re changing two major things at the same time.
You do a full bust adjustment, convert the darts into a princess seam and lower the neckline…but which point are you using as the bust point? The original pattern position or your own? It makes a big difference to fit and contouring.
So when the toile comes out wrong, you genuinely can’t tell if it fits badly because of the full bust adjustment, the princess seams or the neckline change. Is the shaping in the wrong place because you moved the bust point too low or because it was always going to be too low on you? Does the neckline gape because the contouring went to the wrong place or because the original pattern was too wide for you? You're troubleshooting blind.
That's why the "I'll come back to this later" pile exists. Not because you lack the skill, but because the information you needed to solve it was never there in the first place.
What to check on your waistcoat toile, and in what order
Waistcoats are simple garments. No sleeves to distract you, very little ease to hide in, and a front opening that shows every single error.
That's exactly why they're such good practice, and why waistcoat fitting can feel harder than you expect it to.
When your toile is on, work through it in this order. Order matters, because anything you fix at the top changes everything below it.
Balance first. Before you look at anything else, stand naturally and ask: is the CF hanging straight? Is the side seam sitting where it should, or swinging forward or back? If the balance is off, every other problem you can see is a symptom, not the cause.
Then the shoulder and armhole. Everything hangs from the shoulder, and a problem here often shows up lower down on the garment. If your armholes are digging in or gaping, look at your shoulder area first.
Then the neckline and front overlap. A gaping neckline on a waistcoat is nearly always one of two things: either the front is too long for you between shoulder and bust, or there's a problem with your dart shaping.
Finally, tension and excess. Drag lines are often caused by strain in the garment and incorrect wearing ease. Relax your waistcoat by adding in some more ease.
Work through it in that order and you'll find you can spot the problem. Knowing what the problem is, is the first step towards fixing it.
How to make a waistcoat that fits from the start
What if we approached the whole thing differently?
Starting from your own bodice block skips most of these surprises before they happen. Your block already fits you. Your shoulder slope, your back width, your bust position are all built into it before you make a single design change.
So when you draft a waistcoat from it and something looks off, there's only one variable left. The design. You're not untangling a fit problem and a design problem at the same time, because the fit was solved before you started.
That's the whole reason I teach it this way round. Fit first, then design. It sounds like the slower route, but it's actually much faster.
Design, draft and fit your own waistcoat
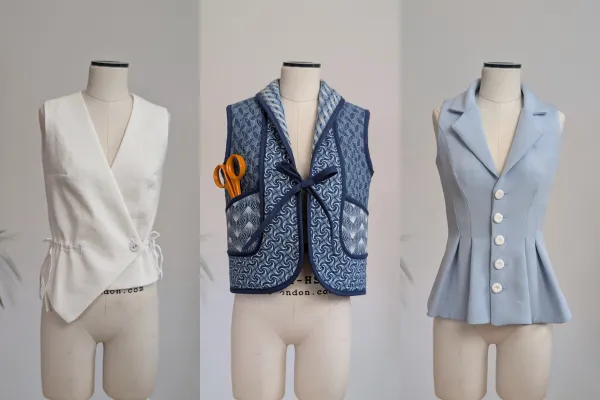
The next deep dive inside my membership is 12 weeks on exactly this, and I've picked three completely different waistcoats to work through:
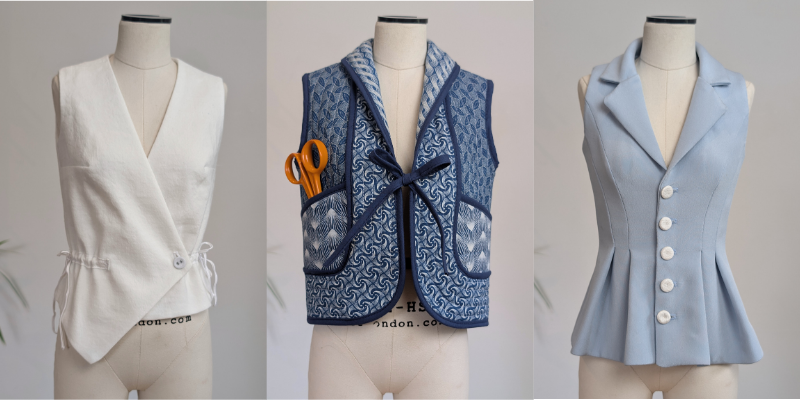
An asymmetric waistcoat with a drawstring detail
A quilted, boxy waistcoat
A tailored waistcoat with a collar, lapel and pleats
You'll learn to draft waistcoats properly, starting from a bodice block. You'll design your own, make a toile, correct your pattern, then make the final garment. New step by step drafting tutorials every week, plus weekly live sessions to keep you moving.
I encourage everyone to make their final waistcoat in full scale, for their own body, from their own block. We're all wonderfully different shapes, so it makes sense that we'll all need different adjustments.
The live sessions are where the fitting help happens. Send in your photos and we'll work out what those drag lines are telling you, together. You also get my bodice fitting course and fitting guide, which cover a lot of what you'll need here.
We’ll also focus on how your waistcoat goes together, and what happens inside. Right through to the waistcoat lining and inner construction that give it that professional finish.
Where to start
If you've never drafted from your own patterns before, start with my free half scale block set. Bodice, skirt and trouser. They're the same blocks I use in all my courses, and aare great for practicing pattern cutting.
The waistcoat deep dive runs inside Level 2 of the membership, we start on the 2nd of September. The doors are open now, sign up here.